Bullet security cameras are one of the most popular outdoor surveillance options for homeowners, and for good reason. Their distinct cylindrical shape isn’t just for looks: it delivers focused, long-range monitoring that’s ideal for driveways, perimeters, and entry points. Unlike dome cameras that blend in, bullet cameras offer visible deterrence while packing serious functionality. Whether you’re adding a single camera to monitor your front door or building out a full property surveillance system, understanding how these cameras work and where they fit best will save you time, money, and headaches during installation.
Table of Contents
ToggleKey Takeaways
- Bullet security cameras provide visible deterrence and long-range monitoring (50-100+ feet) with focused lenses, making them ideal for driveways, gates, and property perimeters.
- Resolution matters: 4MP/5MP bullet cameras offer the best value for residential security, delivering clear facial recognition and license plate capture within 40-50 feet without excessive storage demands.
- PoE (Power over Ethernet) wiring is the gold standard for DIY installations, combining power and data through a single Cat5e or Cat6 cable for simplified setup.
- Proper placement at 8-10 feet high with downward angles captures faces and license plates; mounting directly above doors or too low (under 7 feet) compromises security and risks vandalism.
- Weather resistance (IP66/IP67 ratings) and night vision (30-100+ feet IR range) are non-negotiable for outdoor bullet cameras, with sensor quality and H.265 compression equally important for long-term performance.
- A typical single-family home benefits from 3-4 bullet cameras (front door, driveway, back door, and one side yard) with overlapping coverage to eliminate blind spots and provide backup if one camera is disabled.
What Is a Bullet Security Camera?
A bullet security camera is a surveillance camera housed in a long, cylindrical casing that resembles a bullet, hence the name. The design isn’t just aesthetic: it’s built for outdoor durability and directional monitoring.
Most bullet cameras feature a fixed lens that captures a specific field of view, typically ranging from 60 to 110 degrees depending on the focal length. The housing is usually IP66 or IP67 rated, meaning it’s sealed against dust and can handle rain, snow, and temperature swings. Many models include an integrated infrared (IR) LED array for night vision, allowing the camera to see up to 100 feet or more in complete darkness.
The mounting bracket is built into the design, which makes aiming straightforward, you adjust the angle, lock it down, and you’re done. This differs from dome cameras, which often require ceiling mounts and offer wider, less focused coverage.
Bullet cameras are almost always wired (PoE or coaxial), though some wireless models exist. PoE (Power over Ethernet) is the gold standard for DIY installs because it delivers both power and data through a single Cat5e or Cat6 cable, reducing cable runs and simplifying setup.
Key Benefits of Bullet Cameras for Home Security
Bullet cameras excel in specific scenarios where dome or PTZ (pan-tilt-zoom) cameras fall short. Here’s why they’re a go-to choice for homeowners.
Visible Deterrence
The obvious presence of a bullet camera signals to potential intruders that the property is under surveillance. That alone can discourage trespassing or theft. While dome cameras are discreet, bullet cameras are built to be seen.
Long-Range Monitoring
The focused lens and extended housing allow for longer effective range, often 50 to 100 feet or more. This makes them ideal for driveways, side yards, or monitoring a gate at the end of a long property line.
Weather-Tough Design
With proper IP ratings and sunshields, bullet cameras handle extreme weather better than many indoor-rated options. Look for models rated for -40°F to 140°F if you’re in a region with harsh winters or desert summers.
Easy Aiming and Adjustment
The mounting bracket typically offers three-axis adjustment, so you can dial in the exact angle without dismounting the camera. This is especially helpful when fine-tuning coverage after initial installation.
Affordable Performance
Bullet cameras generally cost less than PTZ or advanced dome models while delivering comparable image quality. A solid 4MP or 5MP PoE bullet camera can be found for $60 to $150, making multi-camera setups budget-friendly.
How to Choose the Right Bullet Security Camera for Your Home
Not all bullet cameras are created equal. The right choice depends on your monitoring goals, environmental conditions, and how you plan to integrate the system.
Resolution and Image Quality
Resolution determines how much detail you can capture. For most home security applications, here’s the breakdown:
- 1080p (2MP): Acceptable for general monitoring but can struggle with detail at distances beyond 30 feet.
- 4MP / 5MP: The sweet spot for driveways, yards, and entry points. Provides clear facial recognition and license plate capture within 40–50 feet.
- 4K (8MP): Overkill for most residential setups unless you’re covering large properties or need forensic-level detail. Requires significant storage and bandwidth.
Beyond pixel count, consider the image sensor. Sony STARVIS sensors are common in mid-range models and deliver better low-light performance than generic sensors. If your camera will monitor shaded areas or north-facing walls, sensor quality matters more than resolution alone.
Also check the bitrate and compression. H.265 (HEVC) compression reduces file sizes by up to 50% compared to H.264 without sacrificing quality, which is crucial if you’re recording 24/7 to a local NVR or NAS. Many smart home camera reviews emphasize the importance of efficient encoding for long-term storage.
Night Vision and Weather Resistance
Night vision is non-negotiable for outdoor cameras. Most bullet cameras use infrared LEDs that emit invisible light, illuminating the scene without a visible glow. Effective IR range varies, budget models might deliver 30–50 feet, while premium units push 100+ feet.
Be realistic about your needs. If you’re monitoring a 20-foot driveway, 50 feet of IR is plenty. If you’re watching a pasture or parking area, prioritize longer range.
Weather resistance is rated using the IP (Ingress Protection) code. For outdoor installations:
- IP66: Dust-tight and protected against heavy jets of water. Suitable for most climates.
- IP67: Can handle temporary submersion up to 1 meter. Better for flood-prone areas or exposed mounting under eaves where ice buildup is common.
Check the operating temperature range. Cameras rated for -40°F are built with internal heaters and weather seals that prevent condensation. If you’re in the Sun Belt, look for models rated to 140°F or higher with metal housings that dissipate heat better than plastic.
Some models include a built-in heater or fan, which adds $20–$40 to the cost but extends component lifespan in extreme environments. If your camera will be mounted on a south-facing wall in Arizona or North Dakota, it’s worth it.
DIY Installation Guide for Bullet Security Cameras
Installing a bullet camera is straightforward, but doing it right the first time saves re-work. Here’s the step-by-step.
Tools and Materials You’ll Need:
- Drill with masonry or wood bits (depending on mounting surface)
- Wire fish tape or pull rod (if running cable through walls)
- Cat5e or Cat6 Ethernet cable (for PoE cameras)
- Cable staples or conduit
- Silicone sealant (outdoor-rated)
- Voltage tester or multimeter
- Ladder (tall enough to reach mounting height safely)
- Safety glasses and work gloves
Step-by-Step Installation:
- Plan the Cable Route
Decide how you’ll run cable from the camera to your NVR, PoE switch, or router. For exterior-to-interior runs, drill through an exterior wall near an outlet or into a basement/attic. Use a ¾-inch hole for a single Cat6 cable with a drip loop. Seal entry points with silicone to prevent water infiltration.
- Mount the Bracket
Hold the mounting bracket against the surface and mark screw holes. If mounting to brick or stucco, use a masonry bit and plastic anchors. For wood siding or soffit, 2-inch wood screws into a stud or rafter tail work best. Don’t overtighten, stripped holes in vinyl or fiber cement siding won’t hold.
- Run and Secure the Cable
Feed the Ethernet cable through the mounting bracket before attaching the camera. Leave 12–18 inches of slack coiled behind the camera in case you need to service it later. Use UV-rated cable staples or exterior conduit if the cable will be exposed to sunlight for more than a few feet. Sunlight degrades standard PVC jacket over time.
- Connect and Adjust the Camera
Attach the camera to the bracket and connect the Ethernet cable to the camera’s RJ45 port. If using PoE, the camera should power on immediately once connected to the switch. Adjust the angle using the bracket’s three adjustment screws, pan (left-right), tilt (up-down), and rotation (image orientation). Use a smartphone or laptop to view the live feed while adjusting.
- Seal and Weatherproof
Apply a bead of clear silicone sealant around the base of the bracket where it meets the mounting surface. Also seal the cable entry point and any unused conduit openings. This prevents water from wicking up the cable or seeping into wall cavities.
- Test Night Vision and Motion Detection
Once mounted, test the camera at night to verify IR coverage. Walk through the monitored area and check motion detection triggers in your NVR or app. Adjust sensitivity to avoid false alarms from tree branches, bugs, or headlights.
Permit and Code Notes:
Most jurisdictions don’t require permits for low-voltage security camera installations. But, if you’re running new circuits or modifying electrical service, consult your local building department. Also respect privacy laws, avoid aiming cameras at neighbors’ windows or public sidewalks where expectation of privacy exists.
If you’re uncomfortable with heights or drilling into brick, hire a handyman or security installer. Typical labor runs $75–$150 per camera, which often includes cable routing and configuration.
Best Placement Locations for Maximum Coverage
Where you mount a bullet camera matters as much as which model you buy. Poor placement creates blind spots, glare, and useless footage.
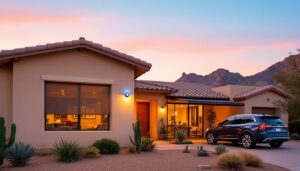
Front Entry and Driveway
Mount a camera 8–10 feet high, angled downward at 15–30 degrees to capture faces and license plates. Avoid mounting directly above the door, you’ll get the top of people’s heads, not their faces. Position the camera to one side of the door, aimed across the approach path.
For driveways, mount the camera at the garage corner or eave, aimed toward the street. This captures vehicles entering and exiting. If your driveway is longer than 50 feet, consider a second camera mid-point or use a varifocal lens model that lets you zoom in optically.
Side Yards and Gates
Side yards are common entry points for break-ins. Mount cameras along the roofline or fence, aimed down the length of the yard. If there’s a gate, aim the camera to capture anyone approaching or opening it.
Avoid placing cameras where landscaping or fence posts will grow and block the view. Check your camera’s field of view with a test mount before drilling permanent holes.
Backyard and Patio
For backyards, mount cameras under eaves or patio covers, aimed toward sliding doors, windows, or sheds. If you have a pool or outdoor equipment, position a camera to cover high-value areas.
Be mindful of glare from pool water or patio lights. Bullet cameras with wide dynamic range (WDR) handle high-contrast scenes better than budget models. Recent home tech reviews highlight WDR as a must-have feature for cameras facing mixed lighting.
Avoid These Common Mistakes:
- Mounting too low: Cameras below 7 feet are easy to vandalize or redirect.
- Aiming into the sun: Direct sunlight washes out footage. Use the camera’s built-in sun shield or reposition.
- Ignoring Wi-Fi dead zones: If using wireless models, test signal strength before permanent mounting.
- Overlooking cable protection: Exposed cables are vulnerable to tampering. Use conduit or route cables inside walls.
Coverage Overlap
For comprehensive security, aim for overlapping coverage between cameras. If one camera is disabled or obstructed, the adjacent camera should still capture activity. This is especially important for corners, gates, and high-traffic areas.
Many home security camera buying guides recommend starting with 3–4 cameras for a typical single-family home: front door, driveway, back door, and one side yard. You can expand from there based on property layout and risk assessment.
Final Placement Tips:
Walk your property at different times of day and note lighting changes, shadows, and potential obstructions. Use painter’s tape to mock up camera positions before drilling. It’s easier to adjust tape than to patch screw holes in stucco.
Bullet cameras are workhorses, when placed correctly, they deliver years of reliable monitoring with minimal fuss.